A Simply Indulgent Meal

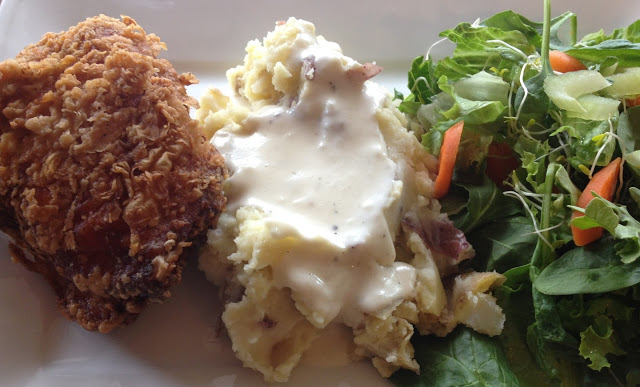
I try to eat healthy . . . most of the time. Really, I do. Even though I believe in using real butter and I’m not afraid of white flour or sugar, I serve the Do-Little Tribe a lot of fruits and vegetables. We make our own artisan bread. All of the beef we use is free range and grass fed. But sometimes, a person needs something indulgent. What is more indulgent than fried chicken? Not the kind you get at the local grocery store deli. Not even the kind that you can get from fast food restaurants. (Although I agree that the Colonel puts something in his recipe that causes fortnightly cravings.) I mean the real, soaked-in-buttermilk, dredged-in-flour, fried-in-oil chicken. That is why I love this recipe. Because it’s simple to make, but indulgently delicious. Plus, I am in love with the DeLonghi premium deep fryer my mother-in-law gave me for Christmas. I use it every chance I get. It has so many wonderful features, including an electronic thermometer and timer, 3 lb. food capacity and an easy-drain oil system. The bowl is huge and dishwasher safe. (The fewer dishes I wash by hand, the happier I am.) Also, it comes with a lid to reduce splatters. It takes all of the inconvenience out of frying. If you are in the market for a home fryer, I recommend you look into this product. I know this sounds like a paid advertisement, but it’s not. I love this product,
Step One: Start with bone-in, skin-on chicken parts. If you’d like, you can purchase a whole chicken and cut it into pieces yourself. Most grocery stores offer whole, cut up chickens for a comparable price. The southern friend who introduced me to this heavenly recipe recommends dark meat. (I’ve been able to purchase thighs for as little as 88 cents per pound.)
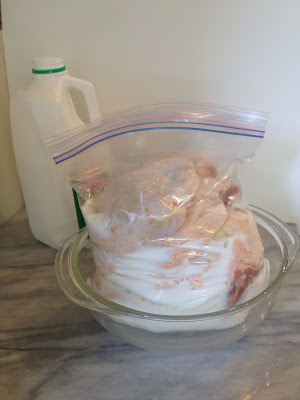
Step Two: Marinate. Place the chicken in a gallon-size ziploc bag and cover with buttermilk (about two cups). The buttermilk has a tenderizing effect. Allow it to soak at least 30 minutes, but as long as 48 hours.

Rotate the bag to ensure the meat is evenly coated with buttermilk
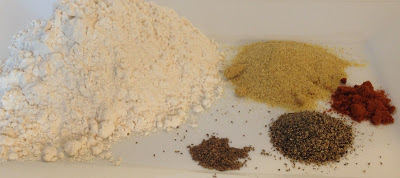
Step Three: Prepare the coating. In another gallon-sized ziploc bag, place flour and seasonings. Zip bag tightly and shake to combine thoroughly.

If you like you chicken a little spicy, you can add a dash of cayenne pepper to the mixture
Step Four: Remove the chicken from the buttermilk.
Step Five: Place the chicken - one piece at a time - in the flour/seasoning mixture, seal the bag and shake to coat.*
*Note: If you prefer your chicken fried “extra crispy,” place the flour coated chicken back in the buttermilk and dredge in the flour a second time.
Step Six: Let chicken rest for 5 - 15 minutes. This step isn’t essential, but it’s smart. Water and oil are not friends. If you let the chicken sit for a few minutes, the meat won’t be as wet and the oil won’t splatter as violently.
Step Seven: Heat the oil. This is the tricky part. If the oil is too hot, the outside gets crispy while the inside remains uncooked (raw chicken = potential health hazard). If the oil is too cool, by the time the inside is cooked, the skin has soaked up to much oil and you are left with meat-shaped grease blobs (yuck). I have found 325 degrees is the magic temperature.
Step Eight: Prepare the oil. I use canola oil in my amazing fryer, but if you find yourself with the use of a fryer, don’t despair, you can use a 12” cast-iron skillet or heavy frying pan. Melt enough vegetable shortening to fill the skillet ⅓ full. Make sure the oil is at a steady 325 degrees before cooking the chicken.
Step Nine: Fry. The wonderful southern woman who taught me to make fried chicken told me to cook it “until it floats . . . then just a little longer”. I have found that 12 - 15 minutes fits that description. If your chicken pieces are on the meaty side, they will take longer to cook. Be sure that the chicken is floating and cooked “a little longer” to ensure no one is served an undercooked piece of chicken.
Step Ten: Enjoy.
An added benefit of this meat preparation is that it is excellent reheated. As long as the reheating is done properly. (By properly I mean the oven, NOT the microwave.) Bake leftover chicken in a 350 degree oven for 10-15 min. Until the chicken is heated thoroughly.
Buttermilk Fried Chicken
3 lbs. bone-in skin-on chicken pieces (I prefer thighs)
2 c. buttermilk
1 c. flour
1 Tbs. Lawry’s Season salt
1 tsp. paprika
1 tsp. pepper
½ tsp. celery salt (I use celery seed if that’s what I have on hand)
canola oil or vegetable shortening
-
Marinate the chicken in buttermilk for a minimum of 30 min (up to 48 hours).
-
In a large bag combine flour and spices. Shake well to combine.
-
Place the chicken in the flour mixture bag, shake to coat. (For “extra crispy” chicken, dip in buttermilk and dredge in flour a second time.)
-
Let the coated chicken rest 15 min.
-
While the chicken is resting, heat oil to 325 degrees.
-
Fry chicken for 12 - 15 min. until the meat is thoroughly cooked.
Note: I have received NO compensation for any of the opinions offered in this post. I truly love and use the products I write about.
Rotate the bag to ensure the meat is evenly coated with buttermilk
|
If you like you chicken a little spicy, you can add a dash of cayenne pepper to the mixture
|
Marinate the chicken in buttermilk for a minimum of 30 min (up to 48 hours).
In a large bag combine flour and spices. Shake well to combine.
Place the chicken in the flour mixture bag, shake to coat. (For “extra crispy” chicken, dip in buttermilk and dredge in flour a second time.)
Let the coated chicken rest 15 min.
While the chicken is resting, heat oil to 325 degrees.
Fry chicken for 12 - 15 min. until the meat is thoroughly cooked.
No comments:
Post a Comment